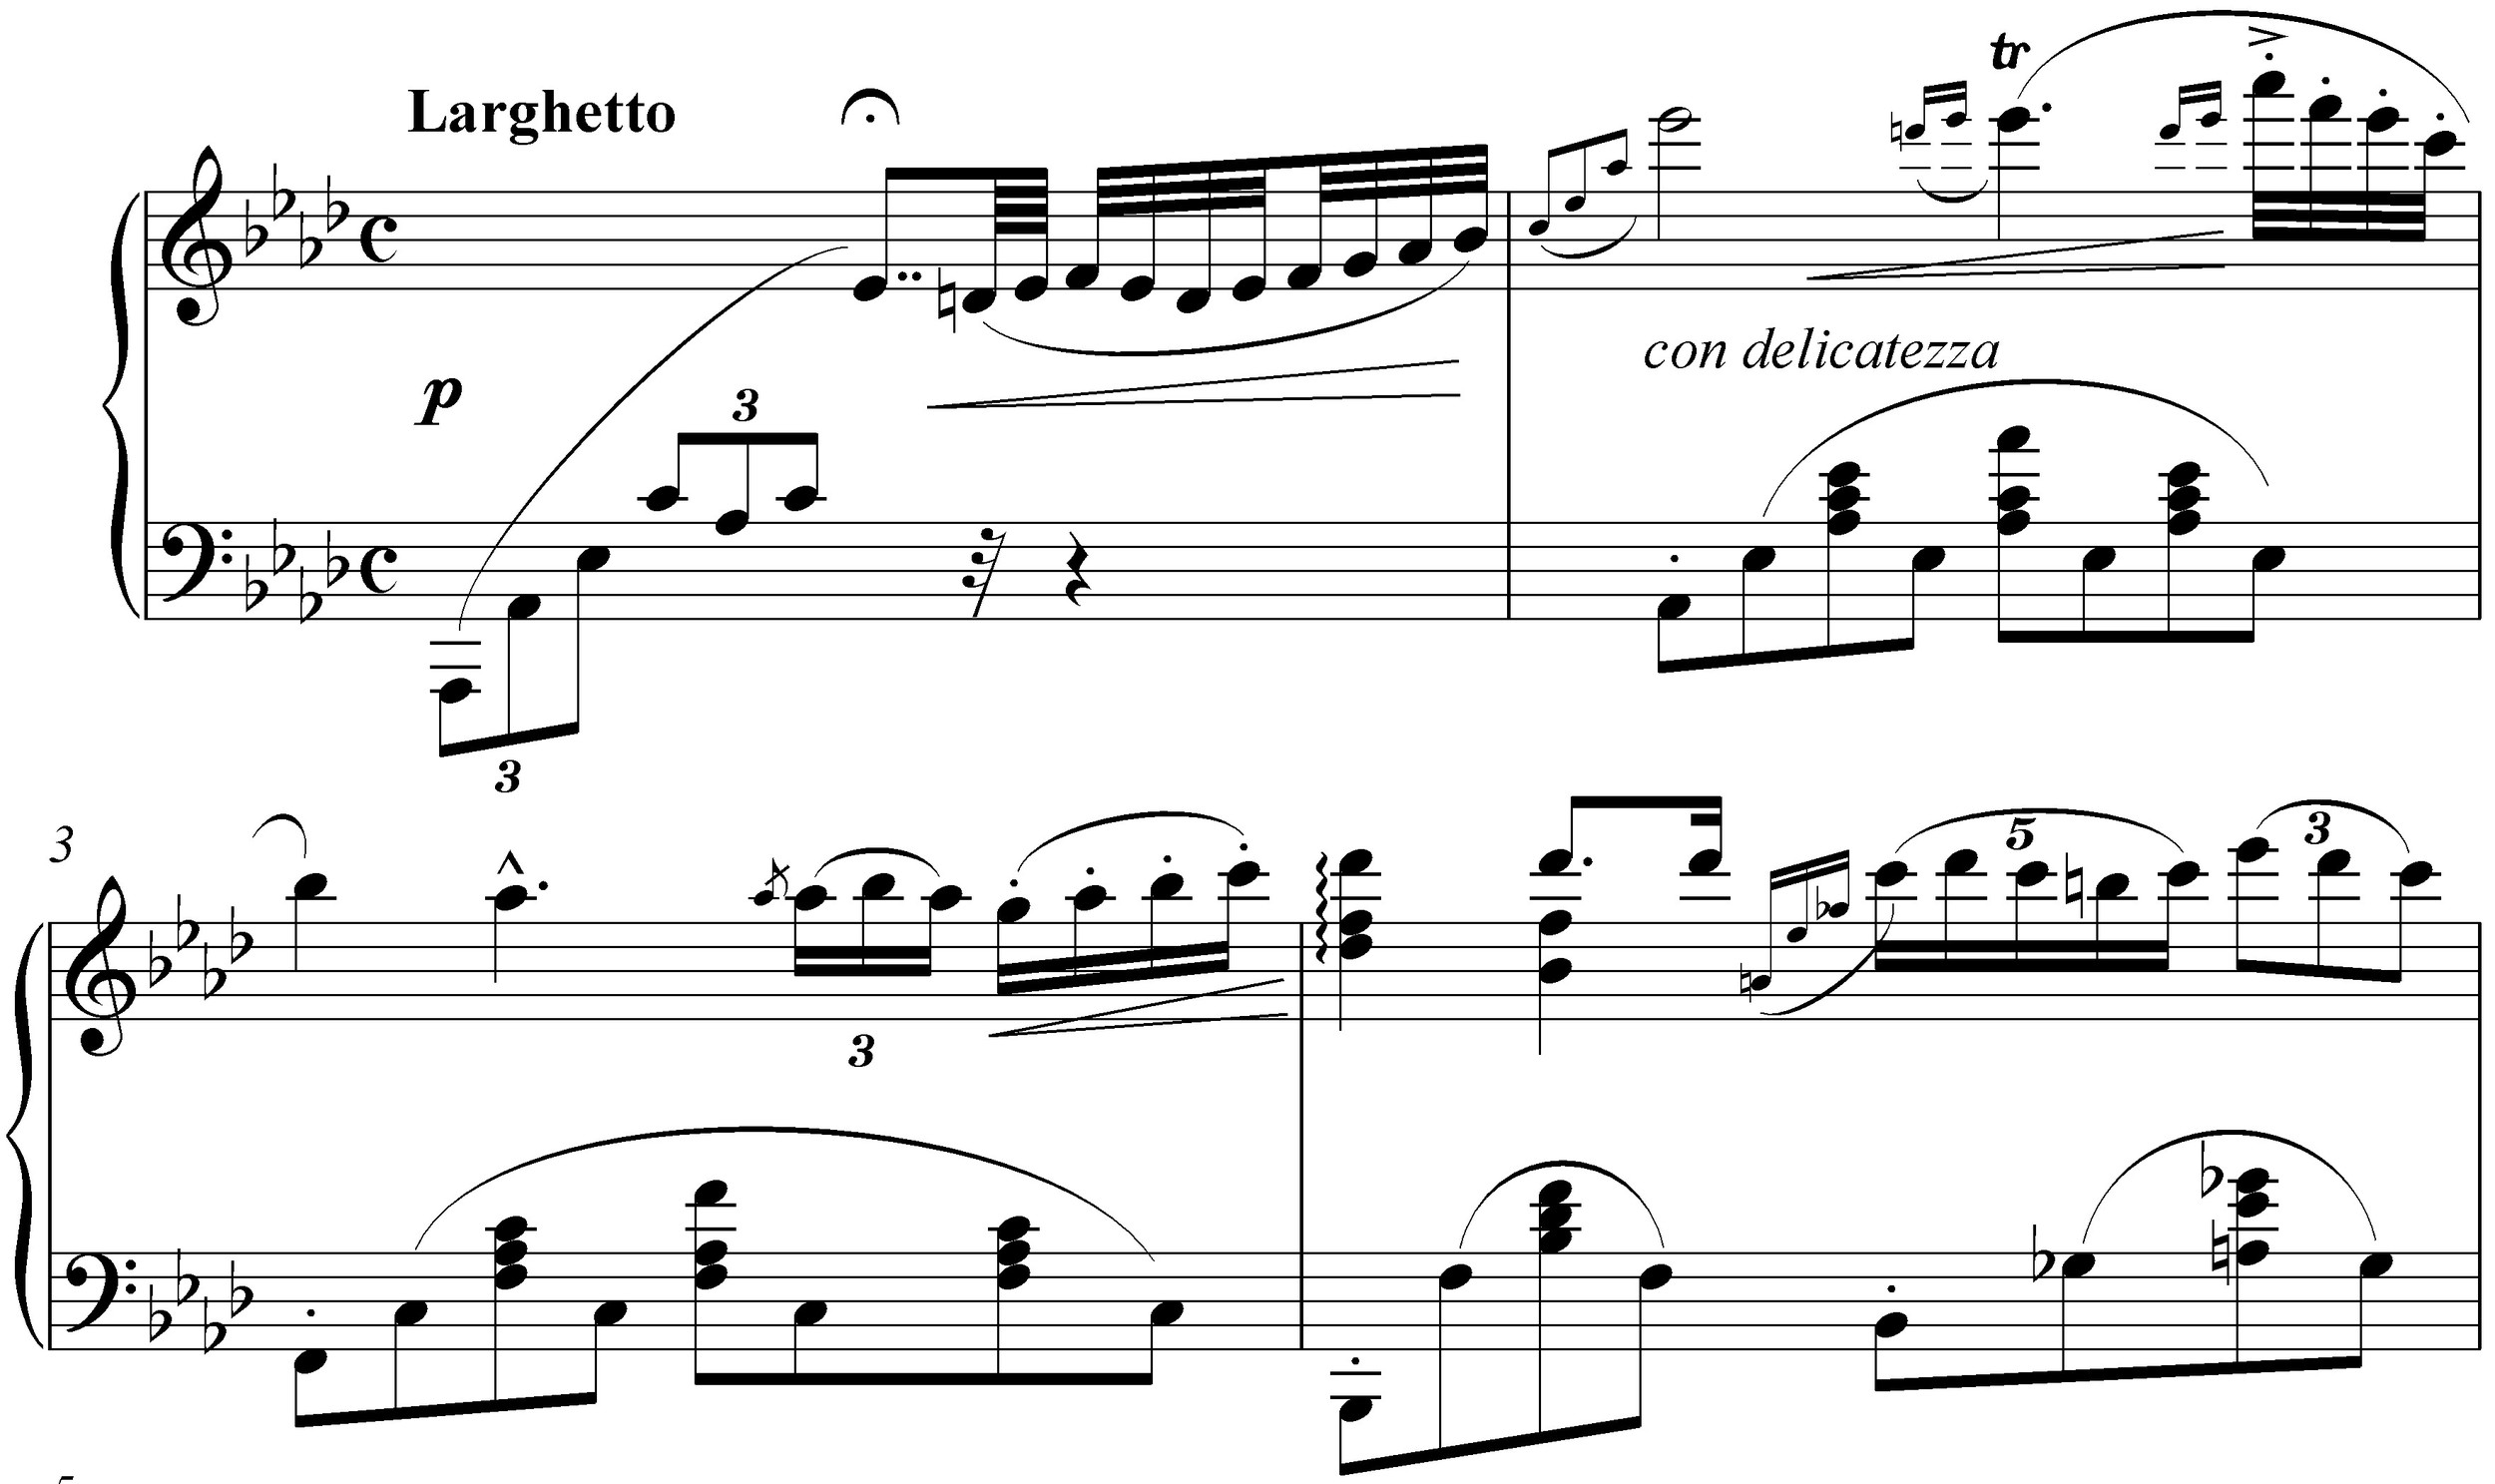
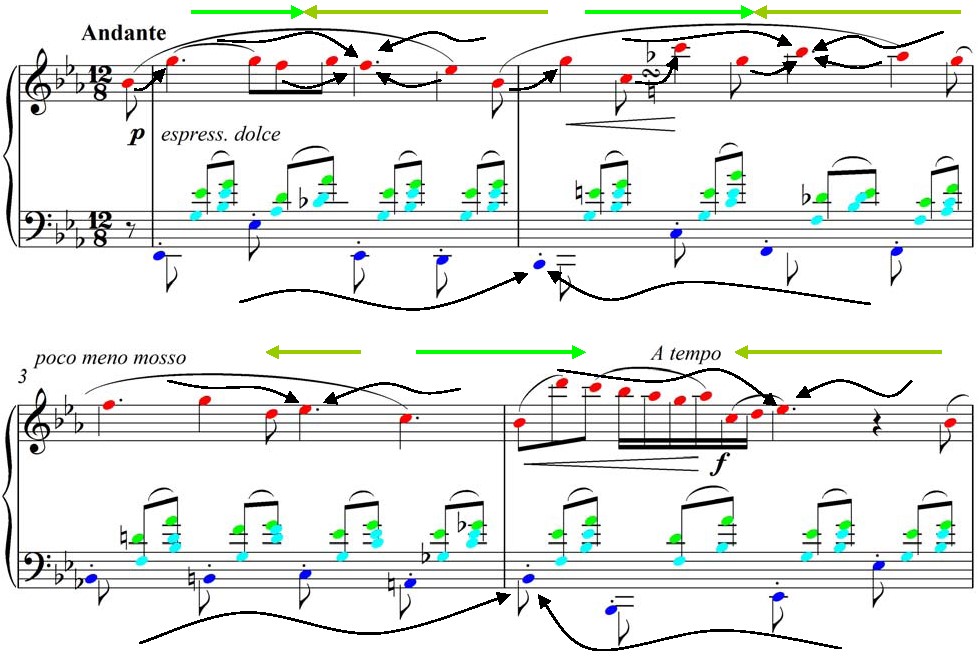
Try to achieve the minute specifications as closely as possible. See if you can discover the rationality behind the seeming randomness of it. What do you like? What do you dislike? Redefine your own Talea choices as needed. Make it your goal to make no two notes exactly the same length, especially two notes side by side.
The Dry Pedal – Finger-pedaling
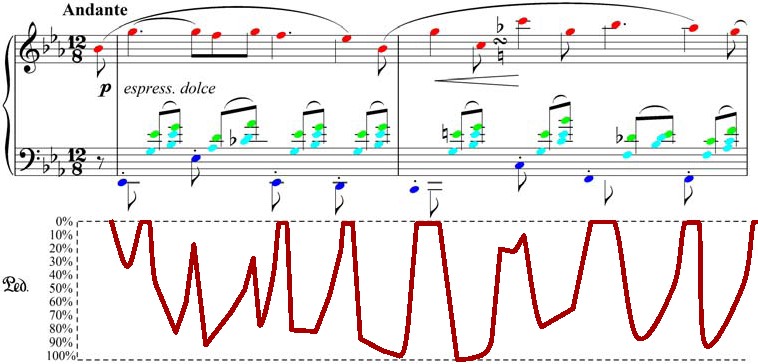
In such a wet example as this, dry pedaling may seem less important, but you’d be mistaken. The reason for this is that a good command of dry pedal works within the pedal to help with every infinitesimal shade of pedaling. If you clear the pedal in the slightest way while holding notes down, those notes suddenly stand out in contrast. You needn’t come even near completely clearing the pedal for this to work. Simply lift the pedal 5% and you’ll hear the difference.
Practice the entire excerpt several times with absolutely no pedal while trying to imitate the effect of heavily smeared, romantic pedaling. At first it may take real self-control not the put the pedal back on, but gradually this drier reality will gain its own appeal and you’ll become comfortable. Then add in the pedal, at first very shallowly, then more generously but with continuous subtle changes. Come all the way up as often as possible, trying to make the melody exist in a drier sphere than the accompaniment. Notice that with the fingers capable of pedaling whenever you need them to, countless new levels of sound possibilities present themselves to you.
Again, pedaling is often understood in simplistic terms. Deep pedal, half pedal and quarter pedal are usually thought of as originating from a completely released pedal. Most pedaling, however, happens between pedals. It happens as the pedal slowly or quickly sinks in or comes out. It happens when you shake off 10% of the bulk of the pedal rising up from 50% depression to 60% depression and back again in a moment. The listener perceives it not as a change in pedal, but rather only as some sort of magical highlighting effect. And she doesn’t know whether you achieved the effect with the pedal or your fingers or both. This is the realm of artistic pedaling.
The pedal is the soul of the Piano. But think of it mechanically occasionally to try to unveil and master its mystique. Think in percentages. Descend quickly 45%, gradually surface over two beats to 20%, then come up quickly to 0%, down just after the next beat 90%. Try to notate it in your score with such precision. Does it still seem too artificial or scientific? Specificity of intent is the very nature of Art. Once you become completely conscious of your choices and of the very technique of pedaling, you will become intuitively wiser in its use. Your knowledge will seep down again below the conscious level and serve you well. Don’t be afraid of knowledge, as some artists are.
As pianists, it’s easy to disassociate ourselves from the nature of the instrument. The Piano is essentially felt-tipped wooden hammers bouncing against strings at play with felt dampers. As the strings vibrate, they rise up and down in various degrees depending primarily on the length of the string and how loud it’s been struck. Imagine that the pedal has descended to the point where the damper is fully raised (and this usually occurs before the pedal is fully depressed, depending on how it’s been regulated). You strike a note staccato, letting it ring out. All of the strings vibrate slightly, some more than others depending on their sympathetic harmonic vibrations. The note that was struck will vibrate most actively and widely, of course. Now begin raising the pedal, ever so slowly, allowing all of the dampers to slowly descend. Eventually they’ll will reach the outer edge of the struck note’s vibration cycle, and begin dampening it gradually. It doesn’t happen all at once, of course; it gradually makes it softer and less clear and finally will dampen it completely only once the dampers have fallen completely. There is an enormous amount of play between slightly brushing the outer edge of the strings’ vibration cycle and completely dampening them. This is why pedaling is so complex and is capable of producing such magical effects.
I spent a full summer in my early twenties tearing apart pianos in my living room, putting them back together and selling them again. At one point, I had three large grands in my small Manhattan apartment. Learning to understand every miniscule part of the instrument and experimenting with altering the interplay of thousands of parts was mind-opening.
I don’t recommend that you necessarily go to the extreme that I did (!), but understanding the mechanics and inner workings of the Piano is important to becoming one with the instrument. Even a few hours of study may open up your mind and change your attitude toward it. Again I’m reminded of what my piano technician mentor and guru at the time had to say about the subject: The more I get to know the inner workings of the piano, the more it becomes a mystery to me.
From the Key Surface or From the Air?
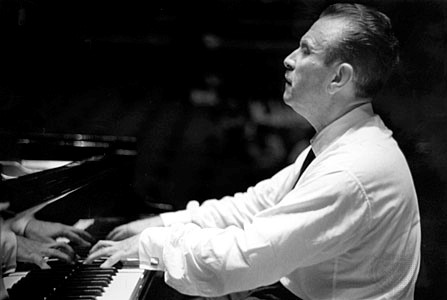
Rubinstein taught me the validity of playing chordal Chopin passages from the air, full-bloodedly. Even passagework under Rubinstein’s fingers was full of life-giving oxygen. Don’t suffocate Chopin by only attacking from the key-surface; constantly vary the amount of oxygen in the sound.
Play the excerpt through, again being aware of how much space you put between your finger and the key-surface on each note. Notate it mentally into your score.
Experiment, as previously, with exaggerated Height and Height Differentiation, going through the various Height exercises from before. Once you’ve finished, work through the score notating new decisions. Then realize your intentions.
To the Key-bottom or Beyond?
Depth is the other side of Height, being both opposite and complementary. As a general rule, Height (separated from Depth) effects the surface of the sound, whereas Depth effects the body of the sound.
Chopin is still often played with very little Depth, as if his creations are too delicate to take any weight. The surfacey Pleyel ideal persists. Yet Chopin without Depth Differentiation is unsubstantial and unsatisfying.
Combining and Contrasting Height and Depth, Vertically and Horizontally
Play through the Chopin excerpt being aware of the Depth of each finger stroke.
Next, work through the various Depth exercises, first without any Height, then adding in Height as desired. Gradually increase your awareness of the connectedness of Height and Depth in each stroke and how they produce differing but often linked results.
Compare it to a golf stroke. For putting, a high preparation will get in your way and likely punch the ball over the green. On the other hand, when driving, if you try to punch the ball 100 yards with a two-inch preparation, you may only send it 100 feet at best. Depth encourages Height and Height Depth.
Golfers also have a choice of clubs to use; don’t use a putter when you need to drive it deep. Clubs correspond to the pianist’s mallets. Using the same Height and Depth but varying the mallet will produce quite different results, both in terms of dynamics and color.
The Pro Golfer knows as well how to balance Speed, Weight and Compression in his stroke. Some strokes and clubs require a meaty weighted swing, others a compressed but slow swing, others a weightless, tensionless, little tap from the wrist. A Tiger Woods understands all of this intuitively and consciously.
At the Piano, often the most peculiar and beautiful colors are produced by combining seemingly contrasting qualities. Imagine for example using a soft mallet (the plush ball of the finger) with a compressed forearm in a weightless, but deep attack. The effect is a penetrating and deep, yet slightly muffled color.
As you gain increasing command of each of the individual filters, seek to consciously combine them, discovering new, more complex filters.
My personal approach to this excerpt and to Chopin in general is to use a relatively greater Depth in the main line while varying the Depth within each line horizontally according to the demands of the phrase.
Try out this approach and then become aware of the ground-rules that define your own approach to Chopin.
On Conducting and Studying the Score Away from the Piano
One of the peculiar qualities of Chopin, as discussed above, is his long phrases based on bel canto. In order to fully appreciate this all-important aspect of Chopin, it’s important for the pianist to learn how to breathe and sing, and this is as good a place as any to sneak in a short introduction to both.
Breathing
For all of you who may have never seriously thought about how to breathe, this will be an important step in your development. There are many places to learn how to breathe properly, such as a good Singing or Yoga manual, so I’ll be brief and let those so inclined search out other sources.
Babies breathe completely naturally from the stomach (laymen terms, although imprecise and sometime inaccurate, are often more useful for immediate comprehension). Adults, for a number of psychological reasons, tend to breathe more from the chest. When adults sleep, however, their breathing returns to its natural state. Over the years, bad breathing habits are formed, and habits, good or bad, feel comfortable.
Observe your own breathing. Standing in front of a mirror, take in a long, deep breath. Where does the air go? Where do you feel the air pass? If you’re like most when they first try this exercise, your shoulders will rise quite noticeably. You’re holding in your stomach, pushing the air shallowly into your chest, and your shoulders tense up a little and rise. People seemingly begin breathing this way as they become aware of how they’re perceived by their classmates at a young age. Everybody wants to look thin and fit, so people hide their breathing by pushing it into the chest instead of allowing it in deep, which causes the stomach to swell gently in and out.
Right now you’re likely alone. Try to shake off the sensation of being watched or judged on a physical level, even by yourself. Breathing should be perceived as an activity that happens mainly below the chest. The ribcage gently rises and falls, on the breath. The shoulders, except for a light sensation of expansion, remain calm, flat and wide. The open, natural sensation of good breathing happens when the shoulders don’t cave in on the chest protectively.
Exhale deeply, then breathe in again. Your stomach will expand outward, as well as sideways and even backwards as you feel your lower back gently expand. It will help to feel all of this if you place your hands on your sides just below the ribcage, your thumbs touching your back and fingers wrapping around front.
{Some people are on some level afraid of learning how to breathe because they fear losing their perception of natural breathing. Don’t worry, this is impossible…}
Because of your bad breathing habits, at first, good breathing will feel a bit awkward and unnatural. Reclaiming your breathing on a conscious level is an immediate but also long, long process. Soon however, you’ll easily discern efficient, natural breathing from tight, high, surface breathing.
The best way to practice breathing is to apply it to Yoga or Singing.
Singing
The key to great singing is great breathing. Amateur singers perceive their voice as coming from their throat and vocal chords; great singers sing from the diaphragm. Although the diaphragm can’t be directly felt, you can feel most of the muscles surrounding it and in this way have a real, direct contact with your voice.
Many great singing pedagogues advocate the noble posture of the Old Italian School. This involves all of the characteristics of good breathing regarding posture discussed above plus one peculiarly singerly technique – slightly raising the rib cage before breathing. To understand this, take in a few good breaths, noticing how the rib cage is pushed up and out during inhalation, and how it slowly collapses during exhalation. Now inhale, and before exhaling, support the ribcage’s elevated position muscularly. Now as you breathe out, hold your ribcage in this noble position. It will still collapse slightly, but considerably less so. Now, without allowing your ribcage to collapse, breathe in again. The sensation of breathing will be much less heavy because the breath won’t be pushing against the ribcage. It will feel unnatural and effortful at first, but you’ll become accustomed to it if you persist. Most of the great singers breathe this way, which is why they often don’t seem to be breathing at all.
As you begin singing, don’t fret about perfect breathing; strive only for improved breathing.
The Old Italian School of Singing, which is the model for the modern international approach to singing, often refers to the notion of appoggio, which means support or leaning. The term appoggiatura, leaning note, comes from the same root verb, appoggiare. There are two distinct ways the term is used, both of which have applications to Piano technique.
The first definition of appoggio is as the root of good sound production. Following a good deep breath, press gently against the breath from the abdomen, side and back muscles before beginning to sing. This compresses the air expressively. It’s the sensation you feel if you were about to blow hot air into your hands to warm them up. Then begin singing while maintaining this sensation.
Try singing a five-note diatonic scale, up and down, in the middle of your range on mi (mee). Breathe in deeply, gently lean on the breath (without letting any air escape), then begin singing.
As the voice moves up, it will need greater breath support. Some pedagogues recommend thinking of breath support as a pyramid. The lower part of your range feels wider and less effortful. As you move up the scale, gradually lean down into it, giving the higher notes more expressive compression and support. The higher notes feel narrower and more compressed.
This brings us into the second definition of appoggio, which is related to phrasing and Energy Pillars. When the energy centers in a phrase, which in vocal music is often the highest note of the phrase because of the vocal intensity that higher notes naturally imply, the expression requires greater support and compression. The first definition of appoggio involves the onset of vocal sound in order to establish a supported, colorful, expressive sound for the entire breath; the second definition means giving greater support to the key expressive moments of a phrase or gesture.
A solid understanding of both definitions of appoggio is key to good singing as well as good Piano-playing
Returning to our Chopin excerpt, sing through the Soprano line (in your own range and changing octaves whenever necessary). See if you can keep each phrase on a single breath; you’ll almost certainly need to catch a number of breaths here and there. Give yourself time to breathe and don’t rush into the next note. Use your own, meager voice – don’t try to be operatic – but try to breathe deeply and properly. Keep reminding yourself that your voice comes from your stomach (diaphragm) and not from your chest, neck, vocal chords or mouth. Sing on whatever vowel or syllable combination comes naturally to you.
Sing through each of the remaining three color layers in the same way, being aware of your breathing and phrasing. As you reach each Energy Pillar, give greater vocal support from the muscles surrounding your diaphragm, centering your vocal and emotional energy.
Return to the Piano, using your fingers and arms to breathe and sing vocally. The sensation of singing begins the same in your energy center, heart and mind, but instead of passing through the vocal chords with your breath, it passes through your arms and out of your fingertips. The differences between singing with your voice and with your fingers are only superficial.
Imagining Real Orchestration
If you were to orchestrate this excerpt, what kind of instrumentation would you use? Whatever your choices, write them into your score with as much precision as possible and then realize your intentions.
Listen to a Soprano aria of Donizetti or Bellini with a great singer and a great conductor. Try to realize the effect of that type of orchestration accompanying a Soprano. This is not the arrival point for understanding Chopin, but it’s a great departing point.
Then listen to the slow movement of either of Chopin’s Concertos from the Full Score and see if you can realize at least the orchestral introduction to either of them at the keyboard. Once you’ve achieved the effect of Chopin’s orchestra accompanying a solo pianist, take that combination of colors and create a similar effect with the Nocturne excerpt, the r.h. as solo pianist and the l.h. as accompanying Orchestra. Now you’re arriving closer to the real language of Chopin – inspired by Opera, but singing pure Piano.
Zen, Circular Energy, and the Four Time Dimensions
Imagine yourself in an Opera House standing on the Conductor’s podium. The Orchestra sits down below you looking up attentively, waiting for your first upbeat. Several Soloists are onstage, as is part of the Chorus. The rest of the Chorus is backstage. The house is full.
You suddenly realize that every person in the house is you. The Opera House becomes your piano, which itself becomes an extension of your own body. You are the Opera House.
This is the essence of Circular Energy and the Four Time Dimensions.
The Four Principle Mallets
As with Beethoven and virtually all music, all four mallets can be used separately or in various combinations to great effect in Chopin.
As before, play through the excerpt becoming aware of the mallets you’re using. Take a few moments to redefine them or clarify them in your mind, notating your decisions in your score as necessary. Realize your intentions and make adjustments.
Work through the various mallet exercises from before; you’ll likely discover fantastic colors that you wouldn’t have otherwise thought of.
The Four Physical Levels
In the same ways as before, work through the various Physical Levels exercises.
The only general advice I’ll offer as you define your interpretation is to play the melody as much as possible from the arm, even in pp. Notate your choices into your score – f. for finger, h. for hand, f.a. for forearm and u.a. for upper arm.
Mimicking Masters ~ The Imitation Filters
By now you should have well over 100 hundred Imitation Filters, and your list should continue to grow. Keep them written down and organized by discipline (Pianists, Instrumentalists, Singers, Conductors, Composers, Dancers, Artists) for easy reference and access. When you access each Master, it may be helpful to remind you of his language, by putting on a recording for a minute, for example. Over time, you won’t need additional stimuli as much.
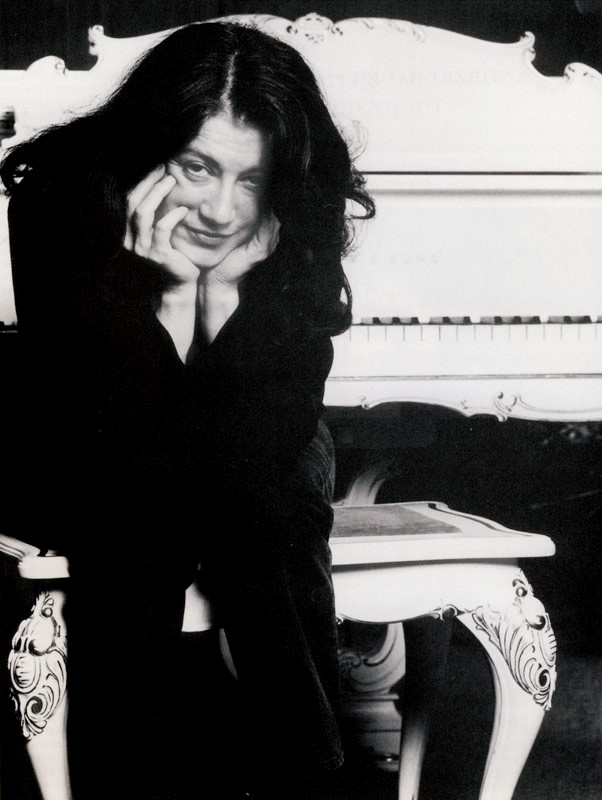
Add to your Pianist list any Chopin specialists that might not already be there. I recommend Ivan Moravec, Ignaz Friedman, Maurizio Pollini, Martha Argerich and Vladimir de Pachmann for starters. The most important part of your list for any style will hopefully be a storehouse of interpreters from the Golden Age; study interpreters with the same respect that you study composers.
The Weight-bar, or the Hand of Karajan
Play Chopin as if Mozart and Mozart as if Chopin. This is a beautiful saying that sheds a great deal of corrective light on the interpretation of both composers as well as on their connection to one another. Chopin should be played with Classical clarity and not as sentimental rubbish; Mozart should be played with warmth, full of expression, and not dryly or primly. In this light, Chopin is usually approached with a finger-based technique as an extension of a Mozartian technique. Chopin’s teaching regarding technique seems to affirm such an approach. His grandness is poured from a porcelain vase. Yet I side with Rubinstein – Chopin is not the weak, sickly, delicate, effeminate figure we often imagine; he has the strength of Liszt and the power of Beethoven. Chopin had a small technique relative to his friend and colleague Franz Liszt. Chopin was comfortable performing in Parisian salons but not onstage in larger halls. Liszt on the other hand possessed a massive technique permitting him to comfortably sing to thousands at a time. Chopin was the first to acknowledge that Liszt was the greater pianist. It was Liszt who opened up Chopin’s eyes as to how the latter’s Etudes should be interpreted
Chopin always responds well to weight, and a bowed technique works beautifully quite often. It all depends on what type of sound and mode of expression you prefer. All of Mozart’s String compositions depend on the weight of the bow against the string – should his Piano compositions be devoid of bowed weight?
Work through the Chopin excerpt noticing where you might already be using a certain amount of bowing. Go through the score notating potential bowings, even specifying up-bows and down-bows if you like. Realize them.
Next, imagining the Hand of Karajan guiding you, play through the excerpt a few times. Follow – don’t lead. Feel a gentle weight sinking you into the keys. Feel the breadth and vision of orchestral expression.
The Hand of God – Using Hammers and Chisels
This filter may seem like the antithesis of Chopin’s noble, elegant, warm and rounded language, but it isn’t. Look again at the reproductions above of Rodin’s Hand of God and Michelangelo’s Pietà. Both pieces, through the medium of rock, resonate all of these characteristics.
Using hammers and chisels in the practice room may as well grate against your manner of interpreting Chopin, but these are tools to be used to carve out a natural pathway so that when you perform, you won’t need to force. Sometimes, forcing occasionally in the practice room, with great sensitivity and care, creates a larger interpretation, as well as a store of excess energy which will often save you onstage.
Chisel your way through the Chopin excerpt, working in marble. Once you become comfortable in the medium, return to the way your intuition dictates that you play the same excerpt. You can be sure that you won’t be left untouched by the power of marble, neither technically nor interpretationally.
After-Touch
Remember that After-touch divides into two parts – the release of the key and the release of the pedal. Releasing the key pertains to the fingers primarily, the hand secondarily. Neither Weight nor Compression directly affects After-touch, only the Speed and pacing of the release. A good Level I technique (finger-technique) is based on staccato or non legato, not legato.
Wagnerian or even Dramatic Verdian Sopranos often have a weak staccato. They specialize in slow, weighted, compressed, legato sounds. When a light, quicker staccato passage comes along, they fake their way over it and hope no one notices. A Coloratura Soprano, on the other hand, delights in letting her voice skip and jump and sprint along at sometimes dizzying speed. Few Sopranos are equally at home in staccato and legato, fast and slow tempos. This applies as well to Instrumentalists.
Remember that releasing the key requires an opposite set of muscles from pressing them down – exercise them! Legato is somewhat relaxing; staccato requires conscious physical effort. When practicing staccato, lower the dynamic level at first to p or pp. Focus your energy on maintaining a short staccato or staccatissimo sound. Staccato focuses your energy on releasing the sound much more than legato. Once you gain command over a dry staccato with a quick release, you’ll gain sensitivity and control over every other kind of touch and speed of release. There’s also a direct link between staccato and speed – the better your staccato, the faster you’ll be able to play.
Our excerpt is relatively slow, which will allow you to give special attention to each release. Play it through without pedal, every note staccatissimo. At first, play p or pp, not f.
Once this becomes comfortable, add in pedal, but keep the finger releases just as short.
Now, change from staccatissimo to non legato, still with pedal. Then play as your intuition dictates, being aware of your choices regarding the length of each touch (Talea) and the speed of each release (larghissimo to prestissimo). You’ll experience now a heightened sensitivity to both Talea and After-touch.
Horowitz’ Voicing
One of my teachers lived and traveled with the Horowitz’s for several years, absorbing everything that the Master could teach him. He made many legendary recordings, including perhaps the greatest recording of Rachmaninoff’s First Piano Concerto, Reiner conducting – a must-own! It’s of course the American virtuoso, Byron Janis.
So much about his playing is heavily inspired by Horowitz and he comes closer than any other to capturing Horowitz language and demonic virtuosity. Yet something’s decidedly lacking. It’s a bit like listening to a Karajan recording and then to his student Ozawa’s rendering of the same work – everything’s there but something is missing.
Then he lost the use of his hands and retreated from the concert scene for decades. When he came back, just as I began working with him, he was a transformed musician. He seemed a bit resentful of Horowitz’s heavy influence on his young development. He had become the anti-virtuoso and a much more thoughtful and poetic thinker about music. I knew he had many answers that I needed, but I avoided taking lessons from him as much as possible so I could make my own discoveries. I only saw him a couple times the first semester and was pleasantly surprised to see that he had given me an A anyway. I ran into him once at the Steinway basement after a long absence from lessons and he smiled kindly, encouragingly, So David, how’s it coming? It’s been a while…
I had come to him because he is himself a colossal pianist, but also because I wanted to know Horowitz’ secrets first-hand. I discovered that Horowitz was the last thing he wanted to discuss.
That’s how Horowitz can be for all of us sometimes. His influence can at times be too great. You can’t imitate him onstage and be convincing. Yet in the practice room he has so much to teach that I feel justified in dedicating a little bit more space in these pages to Horowitz than to any other Master filter.
The first explanation I heard of Horowitz’ voicing came not from Janis, but from McCabe. Imagine playing the note you want to voice slightly earlier than the rest. I learned later that it’s more than simply imagining, but imagining does the trick. Still, this only divides a chord into two layers – the imagined early note and the rest. Horowitz’ voicing is much, much more complex than this. I figured out countless other Horowitz’ voicing tricks along the way, but his own explanation of what I call drop-voicing was the most revealing.
In a five-note chord in one hand, for example, it’s as if the hand becomes a key with five teeth, each gauged according to its place in the chord. Before dropping the key from above the key-surface, or while dropping, you can turn the hand slightly from the forearm, as if turning a doorknob, in order to favor the most important note in that chord. However, turning the hand as you drop it swings the weight of the hand and arm into a single note or group of notes. (This is very much akin to the basic twisting punch of TaeKwonDo.) Swinging the hand (Rotation) can also be separated from dropping the hand, but this is another discussion.
Work through the Chopin excerpt dropping each note or chord in. No finger-legato will be possible. Raise the hand at least two inches for each attack. Set the finger(s) first, turning the hand slightly if needed, then drop in fearlessly, trusting that the sound you pre-hear will come out. You will of course have to work through a bit of rough splashing before this actually happens.
It’s as if you play the notes first in the air, depressing the fingers and setting them in somewhat exaggerated fashion, then play them again with the hand and arm as you drop in. It’s a combination of a Height and Depth attack with a chiseled Hand of God approach.
A ten-note chord in two hands will involve two five-toothed keys opening a sound of ten colors in ten Time-dimensions. And each will have its own dynamic as well. After you become accustomed to dropping in, you’ll discover, somewhat magically, that it’s enough to simply imagine dropping in to get virtually the same effect.
Speed, Weight and Compression
Play through the excerpt being aware of the energy qualities of each note. Label it in your mind as S (Speed), W (Weight), C (Compression), SW, SC, WC or SWC. It’s possible to develop a perfectly acceptable interpretation without changing your approach to energy at all. Work through the example consciously limiting yourself to each of the seven types of energy (the three principle types and the four combinations). Then combine them in various ways at will.
When you feel that you’ve gained a certain command of the possibilities, work through the score, labeling each note or group of notes with a specific quality of energy. Think of each of the seven as colors. Then realize your energy transcription, as if filling in a color-by-numbers picture.
Super-melody
After turning your mind inside out over and over again, examining your subject from every conceivable angle, you always have to come back to the principle melody, learn to forget everything you’ve learned, and focus your mind and heart where it matters. Don’t try to show off your deep knowledge and lofty intentions – you’ll only disappoint your listeners. Instead, trust that everything you’ve studied in the meanwhile will have seeped below the conscious level and come out on its own. You’ll experience it peripherally and will be able to fully appreciate it when you listen to the recording of your performance.
Playing Blind
Liszt chided his pupils, Never look down at the battlefield. Only amateurs have to look at their fingers! For any of you passive readers who still haven’t tried this, know that if five- and six-year-olds can accomplish this effortlessly and joyously, it shouldn’t be such a step for you to as well.


